How to create and Manage Nano Server 2016
How to create and Manage Nano Server 2016
Once the Virtual Machine Hard Disk is created. We can use the same Virtual Hard disk in Hyper-V to create Nano Server 2016. Hyper-v is used to virtualize your server workload. We can use multiple Virtual Machines to run and consolidate on single Hyper-V server. It helps in saving infrastructure cost, management cost, etc. Moreover, it improves high availability of Virtual Machines, enable scalability and flexibility. In this article, we’ll learn the steps to create and manage Nano Server 2016. In the old post, we learned the steps to install and configure Nano Server 2016.
Steps to host Virtual Hard Disk on Hyper-V Server 2016
Step 1:
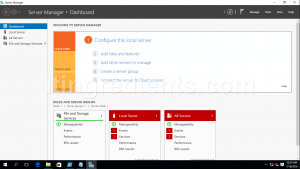
Login to Windows Server 2016 and then click on Start and select Server Manager
Click on Manage and then click on “Add roles and features” option to add HyperV role in Windows Server 2016.
Step 2:
Select the option “Role-based or feature based installation“. This option is used to add Roles and Features.
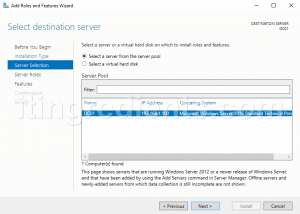
Select the Server from the Server Pool, in this practical, we only have one Server i.e. DC01. Select the same and click on next.
Step 3:
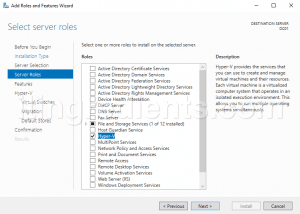
Select the Hyper-v role and then click on Add Features. It would add all the dependent features required for Hyper-v.
Click on next twice.
Step 4:
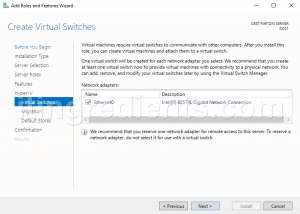
Virtual Machine requires virtual switch to communicate with other Virtual Machines. Select the network adapter that would communicate with Virtual Machines and physical network.
Click next twice.
Step 5:
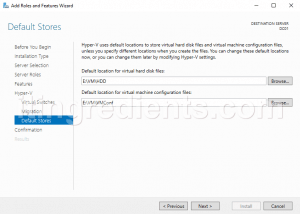
Define the location of Virtual hard disks and virtual machine configurations. All the new Virtual Machines would be saved at this location. However, during VM creation we can define alternate location.
Step 6:
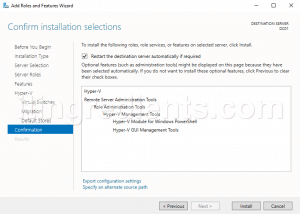
Click on Install to start the Hyper-V installation.
Restart the server once Hyper-V installation is successfully completed.
Step 7:
Open Hyper-V manager by clicking on Start button, All Apps, Windows Server Administration and then Hyper-V Manager.
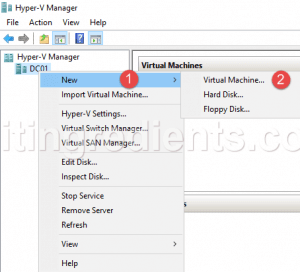
On the Hyper-V manager console, right click on the Server name, click on New and then click on Virtual Machine to create and manage Nano Server 2016.
Click on next twice.
Step 8:
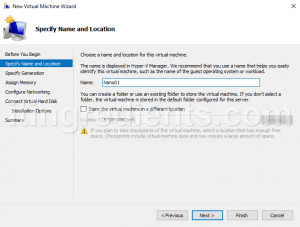
Specify Virtual Machine name, for this practical we have defined the name as Nano01.
To save the VM at an alternate location select the option “Store the Virtual Machine in a different location” else click on next.
Steps to create Virtual Machine in Hyper-V Server
Step 9:
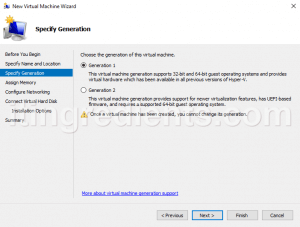
Select the generation of Virtual Machine, for this practical we’ll select “Generation 1“.
Step 10:
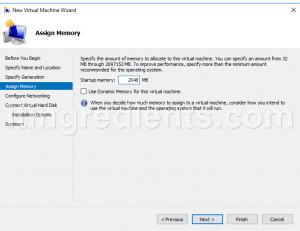
Define the amount of memory to allocate to this Virtual Machine.
Step 11:
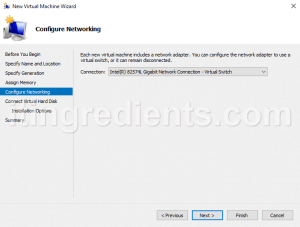
Select the Virtual Switch required for communication or it can be remained disconnected if you don’t want any communication with the external physical Network.
Step 12:
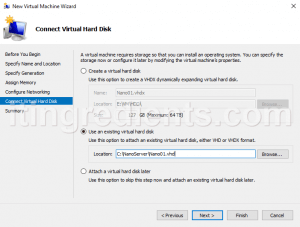
Now this is important option to define the Virtual Hard Disk we have created for Nano Server 2016.
Select the option “Use an existing virtual hard disk” and browse the path where you have saved the Virtual Hard Disk of Nano Server 2016.
Click on next and then click on finish to create Nano Server 2016 VM.
Step 13:
Once the VM is created, right click on the VM and then click on start and connect. It would power-on the VM and show the console.
Once started we’ll see an option to “Authenticate”.
Enter User name and password to login to Nano Server 2016.
Step 14:
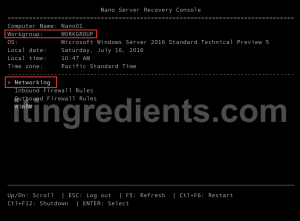
By default the newly created Nano Server would be in the Workgroup. To assign the IP Address to this Server select Networking and then hit Enter.
Step 15:
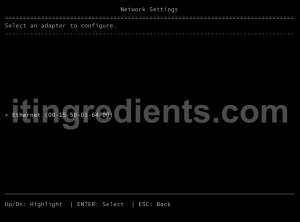
Select the network adapter that you want to configure and hit Enter.
Step 16:
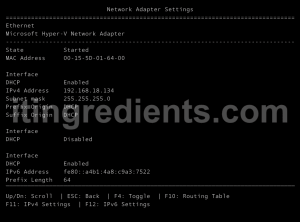
On the Network Adapter Setting window, press F11 from keyboard to configure IPv4 settings.
Step 17:
By default DHCP is enabled on the Server, press F4 again to Toggle and disable DHCP option.
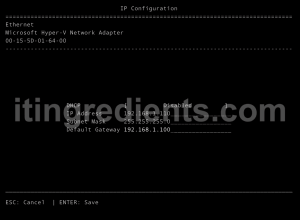
Define the IP Address, Subnet Mask and Default Gateway. For this practical, we have assigned IP Address 192.168.1.110 to this Nano Server 2016. Hit Enter to Save the IP configuration.
Step 18:
Once Network Settings are configured, you can close the Window, open PowerShell and type the command. This command modifies the TrustedHosts list for the WinRM client. This would add the append the trusted list and add all the computers that you would like to communicate to the trusted host list. You can restrict the list by typing the IP address of Computer instead of using star (*) symbol. Click or type Yes when ask for input.
Set-Item WSMan:\localhost\Client\TrustedHosts -Value *
Step 19:
To remotely connect to Nano Server 2016 enter the below mentioned command. Instead of ComputerName we have defined Nano Server’s IP Address and defined the local Administrator credentials of Nano Server 2016. Hit Enter and it would ask for the password, enter password and hit enter.
Enter-PSSession -ComputerName “192.168.1.110” -Credential nano01\Administrator
Step 20:
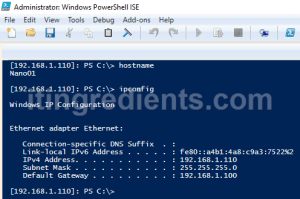
Once connected you can use the command Hostname to check the name of the Server and type the command IPconfig to check the IP Address of Nano Server. Using PowerShell you can manage Nano Server 2016 remotely.
This concludes the steps to create and manage Nano Server 2016. Please feel free to leave your comments and suggestions in the comment section and don’t forget to share this article with your friends and colleagues.


